About the authors: Ernesto Sánchez (@ernesto_xload) and Joel Serna (@JoelSernaMoreno) are computer security consultants who have participated in events such as: Black Knife, MorterueloCON and Eastmadhack.
Hi everyone!
Long time ago, we show you how to make a BadUSB device so cheap (around 1 euro), you can read it here. To practical effects, we explained how to mount a Rubber Ducky USB device, in the matter that it behaves like an automatic keyboard and pre-programmed to do some specific functions. but may be some short sometimes, especially by the limited storage and RAM memory of your ATTINY85 microcontroller: 8KB flash and 512 bytes of ram.
As it not be otherwise, we have been thinking this matter and offer something more functional and, above all, easier to use. One of the desirable options, that seemed to us most useful, was that you could directly use USB Rubber Ducky scripts without having to adapt them in any way, due to its extensive expansion, knowledge and examples that exist on the internet.
As we mentioned in the previous article, a BadUSB is a USB device with the appearance of another device (for confuse the user) that when is connected to any computer does «other things», The more usual fact, emulates a keyboard that automatically «types» what we have programmed at high speed without the user realizing what we have done.
When we talk about BadUSB, overall, we talk about many devices, from some hacked devices, to such effect as the pendrives with the controller Phison 2251-03 (2303), generic development devices such as Teensy (in any of its variants), Arduino Leonardo / Micro or specific devices oriented to Security audits such as the Phoenix Ovipositor or the USB Ruber Ducky, being this last one the most famous among the hacker community (always be understood in the good meaning of the word, for more information about hacker community visit this link).
Not only because it is the most famous, and because we will end up using its scripting language, we are going to review the USB Rubber Ducky: it is a device developed and marketed by the US company Hak5 that once connected to the computer, it behaves like a virtual keyboard, programmable through a relatively simple scripting system (scripts that once written must be compiled and stored in binary format on your micro SD card).
As an example: the classic «Hello World»:
| DELAY 3000 GUI r DELAY 500 STRING notepad DELAY 500 ENTER DELAY 750 STRING Hello World!!! |
ENTER
The code does the following things:
DELAY 3000: Wait «x» milliseconds (in this case a long pause occurs at driver installation on the computer, but it is also used to a reasonable time to open a program or other tasks)
GUI r: Press the Windows (GUI) and «R» keys simultaneously to open the window
«Run» on a Windows operating system
STRING notepad: Sends a characters string, in this case Notepad (editor texts of windows)
ENTER: Send the Enter key, in this case to execute the program Notepad
STRING Hello World!!!: Send a character string, in this case Hello World!!!
ENTER: Send the Enter key, in this case to enter the new line character.
The full reference to the scripting language can be found here, some scripts here (Most scripts can be found revised for Windows 10 in Joel’s github).
Once explained for what the device serves are used and showed an example payload, some people may find a problem: the price, it costs about 45 US $ (Plus $ 12 shipping cost) which is fine for some professional sectors, but for “normal people like us” maybe that price is outside the budget if we only want to “play a little”
That is why, after searching, view differents options and a lot of hours of itching code, we show you how to make a perfect USB Rubber Ducky clone, which interprets their scripts perfectly without even having to compile them, for only 10 € or less.
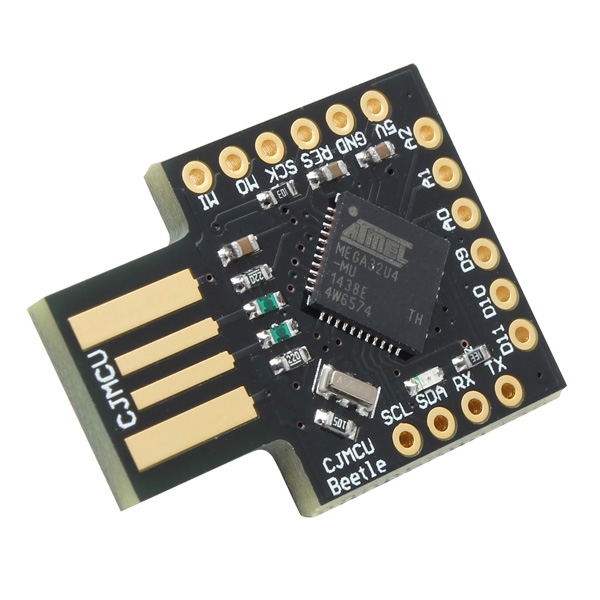
The device which we are going to use is this:
It can be easily found on aliexpress, searching for badusb
EXPLANATORY NOTE: Although other devices are output in the results article we refer ONLY to that shown in the photograph
The device has the following hardware features:
-
ATmega32u4 microcontroller (32KB flash and 2.5KB ram) with Bootloader by Arduino Leonardo
-
MicroSD card
-
Auxiliary circuitry varies (discrete circuitry, oscillator at 16mhz, Voltage to 3.3v and level converter)
Installation and configuration:
To be able to do this BadUSB, we will need:
- Have the device mentioned above.
- Arduino IDE (Downloadable from https://www.arduino.cc/en/Main/Software)
- Once installed we must make sure that the libraries are updated.
- In case of using Linux we must make sure that our user belongs to the dialout group
- In case of using Windows we must have correctly installed the Arduino Leonardo drivers
- Multi language keyboard library (https://github.com/ernestoxload/arduino_keyboardlib) Since by default the arduino only supports Keyboards with the en_US layout
- Interpreter Firmware: Downloadable from here
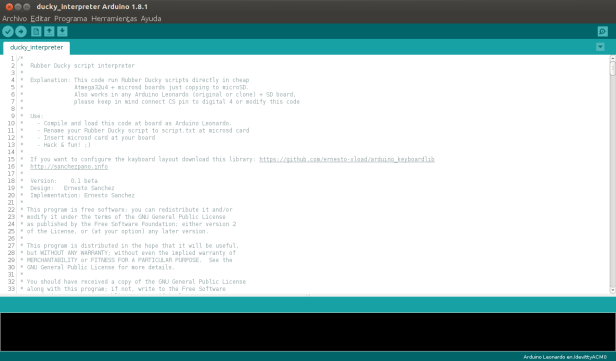
Once everything is properly installed, run the Arduino IDE and open the Interpreter code: File > Open
We have to make sure everything is set up for the board compatible with Arduino Leonardo, for this we go to the option of tools -> Board -> «Arduino Leonardo «. Possibly we will assign the port, if not, select the port corresponding.
We connect the device.
We compile and upload the code with the corresponding button.
At the bottom of the Arduino IDE we will see if it has been recorded correctly:
With this instructions, we already have the USB Rubber Ducky clone ready for use,now er need copy the corresponding Rubber Ducky USB script into a microsd formatted in fat16 or fat32 with the name «script.txt» and once inserted in a computer shall, it begin to run it.
Of course, the source code of the interpreter is free software and we can modify it to our liking, adding new commands or customizing them exist, there are, in fact, two extra commands by way of example: led_on and led_off (In lower case) that turn on and off the present LED.
As an example we will test the payload You got quaqued!, from the repository itself Hak5.
NOTE: Some payloads made for USB Rubber Ducky , they are available at Hak5 repository, are prepared for Windows 7, and need to be modified for latest versions of this operating system (you can find modified in this link as we have said previously). In this matter, we have modified it to be able to use it in Windows 10 and we have no error:
| DELAY 1000 GUI d DELAY 500 GUI r DELAY 500 STRING chrome DELAY 500 ENTER DELAY 5000 STRING https://i.imgflip.com/1dv8ac.jpg DELAY 500 ENTER DELAY 3000 CTRL s DELAY 1000 STRING %userprofile%\Desktop\QUACKED ENTER DELAY 500 GUI d DELAY 500 GUI r DELAY 500 STRING %userprofile%\Desktop\QUACKED.jpg ENTER DELAY 1000 MENU DELAY 500 DOWNARROW DELAY 500 DOWNARROW DELAY 500 ENTER ALT F4 DELAY 500 GUI d DELAY 500 MENU DELAY 500 STRING v DELAY 500 STRING d |
As a summary: what payload does is open Chrome, enter a link where we find an image of the USB Rubber Ducky, download it, puts it as Desktop wallpaper, and finally, it hides all the icons on the desktop.
We can see that the language that uses this payload, is exactly the same used by USB Rubber Ducky. In this way, we can use any existing payload for Rubber Ducky, create our own payloads with the same language or use one of the multiple tools that automatically generates them as Metasploit.
Bonus track:
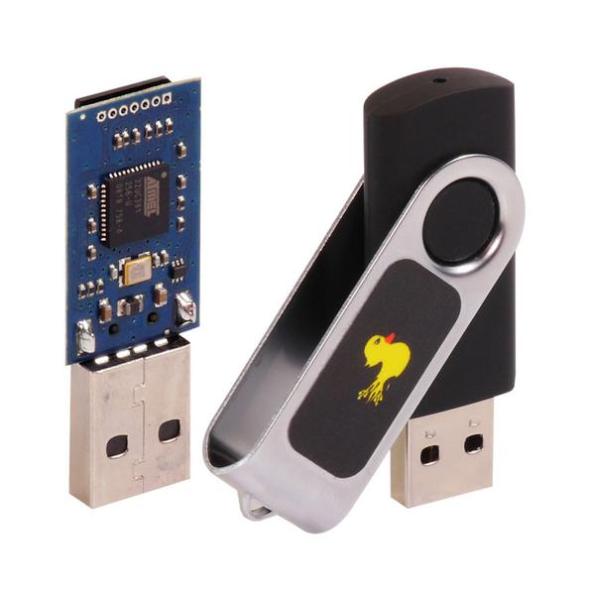
In the search we have done previously in aliexpress, we have been able to see how other devices appear, some based on the Attiny85 that we covered in the entry BadUSB Ultra Low Cost, and others based on the Atmega32U4 like the one we talked in this article, but without socket for Micro SD card, are the ones that can be seen below:
Its curious the fact that it is directly marketed with the shape of a finished pendrive (covered with aluminium), If you want to realize a pentesting, this would be the most suitable to leave in the surroundings of the objective, and wait for someone to connect it. We can not forget the test done by Elie Bursztein in April 2016 expressed in «Concerns about USB security are real: 48% of people do plug-in USB drives found in parking lots» the rates speak for themselves, and they are overwhelming.
In this case we can not do script kiddies or use any tool «Fat button»and we will have to program the code that we want to run on the Microcontroller directly, thats not a very complicated task because there are a lot of documentation for it, but, my dear friends … hacking involves learning and Knowing, that’s why we never give you everything done,It loses its appeal.
Here is an example, very basic that opens a notebook and write the string «hello world» (it is valid for both Windows and Linux with Gnome or derivatives commenting and / or uncommenting the corresponding lines):
#include "Keyboard.h"

void setup() {
	// Inicializamos el teclado
	Keyboard.begin();

}

void loop() {
	delay(20000); // Espera 20 segundos (20000 milisegundos) 	CommandAtRunBarMSWIN("notepad"); // Abre notepad en Windows 	//CommandAtRunBarGnome("gedit"); // Abre gedit en Gnome
	Keyboard.println("hola mundo"); // Enviá “hola mundo”
	while(1); // Detiene la ejecucion del programa.

}

void CommandAtRunBarMSWIN(char *SomeCommand {
	Keyboard.press(KEY_LEFT_GUI);
	Keyboard.press('r');
	delay(100);
	Keyboard.releaseAll();
	delay(1500);
	Keyboard.print(SomeCommand);
	Keyboard.press(KEY_RETURN);
	Keyboard.releaseAll();

}

void CommandAtRunBarGnome(char *SomeCommand){
	Keyboard.press(KEY_LEFT_ALT);
	Keyboard.press(KEY_F2);
	delay(100);
	Keyboard.releaseAll();
	delay(1500);
	Keyboard.print(SomeCommand);
	Keyboard.press(KEY_RETURN);
	Keyboard.releaseAll(); }
The CommandAtRunBarMSWIN and CommandAtRunBarGnome functions have been from IronGeek’s phukdlib bookstore which were originally created for Teensy devices. You can download it modified for Arduino Leonardo and compatible here.
For any doubt or suggestion you can contact us by the Links we have provided from Twitter and Github, or the Telegram channel from The Hacker Way.
See you soon!


Is there a way to replicate the USB rubber ducky «Twin Duck» feature on this bad usb? That’s the feature that allows you to use the SD card as mass storage as well as HID device.
Me gustaMe gusta